Table of Contents
ToggleIntroduction to Custom Post Types in WordPress
WordPress is often mistaken for a simple blogging platform, but at its core, it is a robust Content Management System (CMS). One of the features that elevates it to this status is the ability to create Custom Post Types (CPTs). By default, WordPress comes with a few standard post types: Posts, Pages, Attachments, Revisions, and Navigation Menus. However, what if you are building a website for a movie review site, a real estate directory, or a portfolio? Using standard ‘Posts’ for these diverse content types would lead to a cluttered and unorganized backend.
In this wordpress custom post type tutorial for beginners, we will explore exactly what CPTs are, why they are essential for modern web development, and provide a step by step wordpress custom post type guide to help you implement them using both plugins and manual code. Whether you want to know how to create a custom post type manually in wordpress or prefer the easiest way to add custom posts to wordpress via a plugin, this guide covers it all.
What are Custom Post Types?
Before diving into the technicalities, let’s define our terms. A ‘Post Type’ is a term used to refer to different types of content in WordPress. While ‘Posts’ are generally used for chronological blog entries and ‘Pages’ for static content like an ‘About Us’ page, Custom Post Types allow you to define your own content structures. Common examples include:
- Products (for e-commerce sites)
- Testimonials
- Portfolio items
- Staff members
- Events
- Recipes
By creating a wordpress CPT guide for your specific project, you ensure that the data remains structured and easy to manage for the end user.
Why You Should Use Custom Post Types
Using wordpress custom content types offers several advantages. First, it keeps your WordPress admin area organized. Instead of having 500 blog posts mixed with 50 portfolio items, you have a dedicated menu item for ‘Portfolio’. Second, it allows for better SEO and site structure. Search engines can better understand the hierarchy of your site when content is logically grouped. Third, it allows you to apply unique templates and custom fields to specific content types without affecting your regular blog posts.
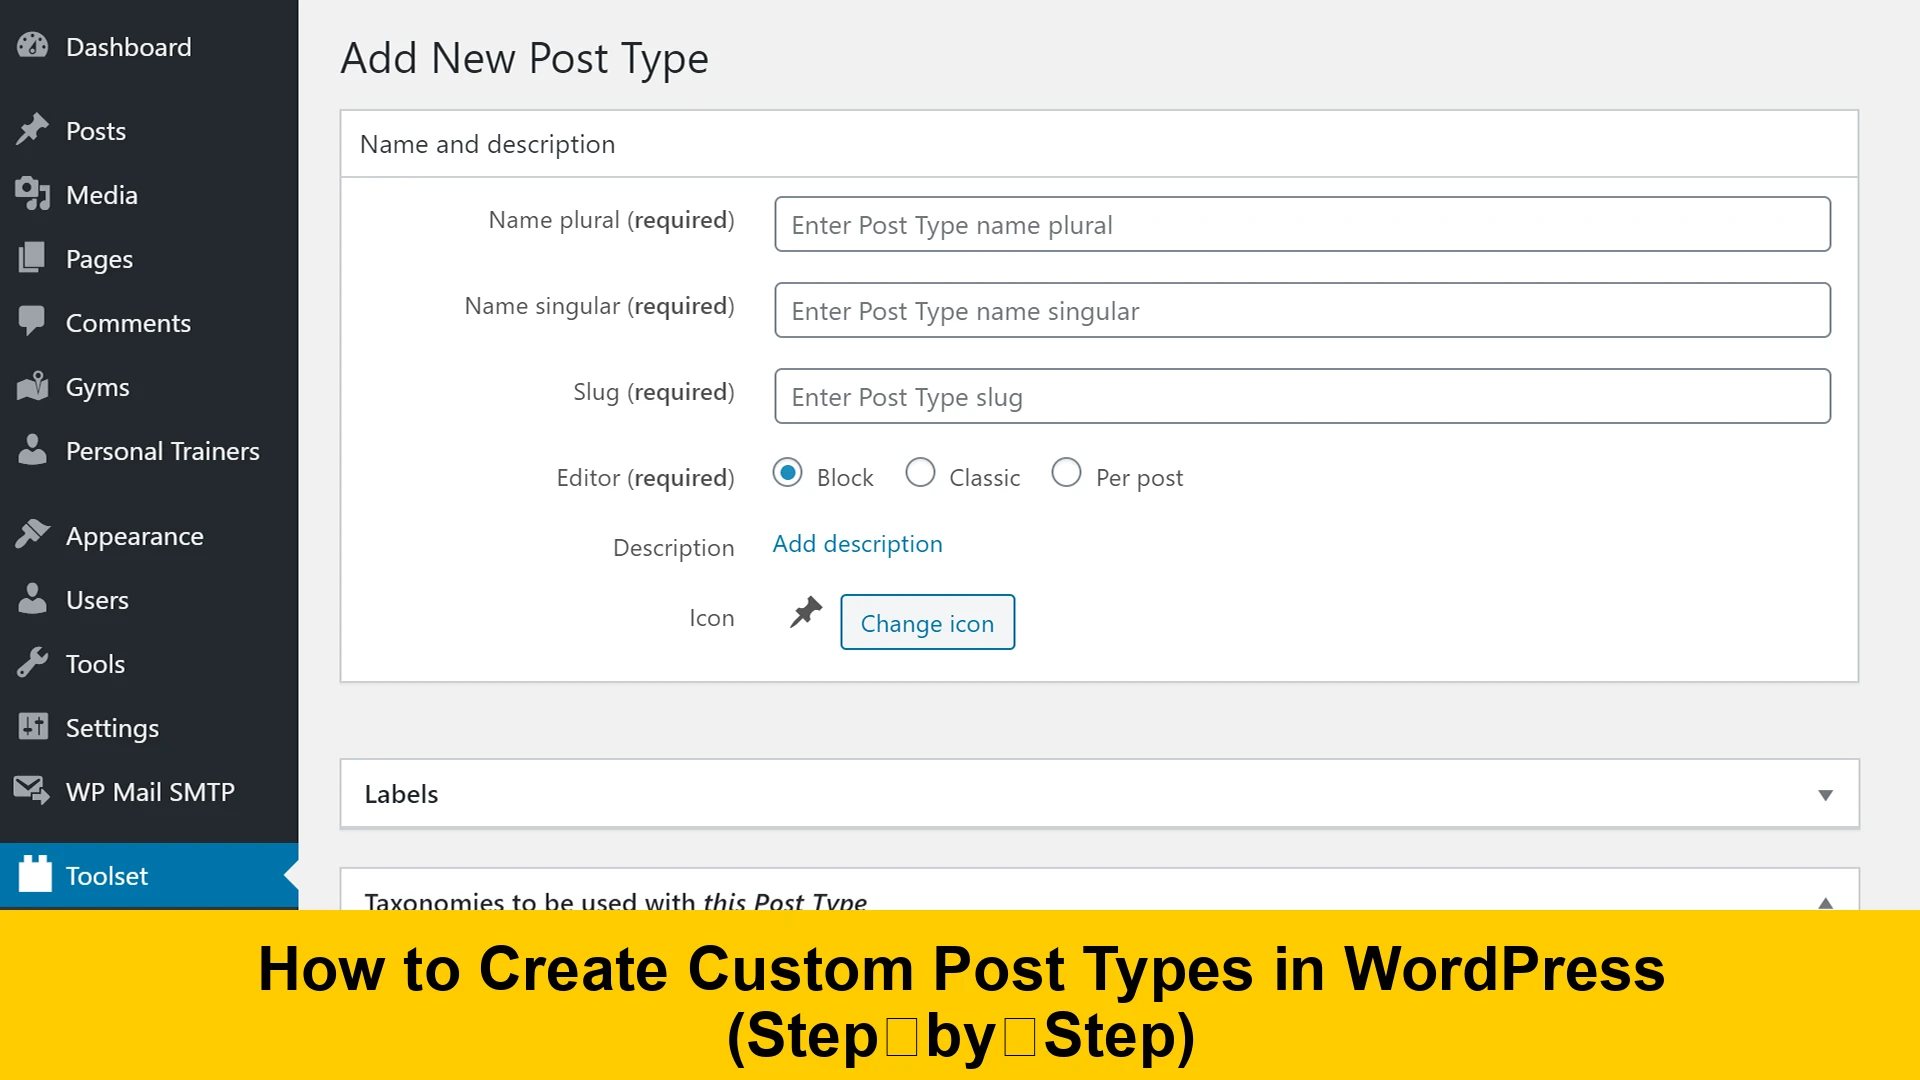
Method 1: Creating Custom Post Types with a Plugin
For many users, creating custom post types with custom post type ui plugin is the most efficient route. It eliminates the need to touch any code and provides a user-friendly interface. This is arguably the easiest way to add custom posts to wordpress.
Step 1: Install Custom Post Type UI
Navigate to your WordPress dashboard, go to Plugins > Add New, and search for ‘Custom Post Type UI’. Install and activate the plugin developed by WebDevStudios. You can find more information about this plugin on the official WordPress plugin repository.
Step 2: Add/Edit Post Types
Once activated, a new menu item labeled ‘CPT UI’ will appear. Click on ‘Add/Edit Post Types’. Here, you will see several fields:
- Post Type Slug: A unique identifier (e.g., ‘movies’ or ‘testimonials’). Use only lowercase letters and no spaces.
- Plural Label: The name used in the menu (e.g., Movies).
- Singular Label: The name for a single item (e.g., Movie).
Step 3: Configure Additional Settings
Scroll down to the ‘Settings’ section. Here you can choose whether the post type is public, has an archive, and which features it supports (Title, Editor, Featured Image, Excerpt, etc.). If you want your CPT to behave like a ‘Post’, ensure ‘Hierarchical’ is set to false. If you want it to behave like a ‘Page’, set it to true.
Method 2: How to Create a Custom Post Type Manually in WordPress
If you prefer to keep your site lightweight and avoid extra plugins, you can register custom post types manually. This involves adding a wordpress custom post type code snippet for beginners to your theme’s functions.php file or a site-specific plugin.
Understanding the register_post_type Function
The core function used to create a CPT is register_post_type(). It takes two arguments: the name of the post type and an array of arguments that define how it works. For more technical documentation on this function, you can visit the WordPress Developer Resources.
The Manual Code Snippet
Below is a basic example of how to manually register a custom post type called ‘Books’.
// The custom function to register a CPT
function custom_post_type_books() {

    $labels = array(
        'name'                  => _x( 'Books', 'Post Type General Name', 'text_domain' ),
        'singular_name'         => _x( 'Book', 'Post Type Singular Name', 'text_domain' ),
        'menu_name'             => __( 'Books', 'text_domain' ),
        'name_admin_bar'        => __( 'Book', 'text_domain' ),
        'archives'              => __( 'Book Archives', 'text_domain' ),
        'attributes'            => __( 'Book Attributes', 'text_domain' ),
        'parent_item_colon'     => __( 'Parent Book:', 'text_domain' ),
        'all_items'             => __( 'All Books', 'text_domain' ),
        'add_new_item'          => __( 'Add New Book', 'text_domain' ),
        'add_new'               => __( 'Add New', 'text_domain' ),
        'new_item'              => __( 'New Book', 'text_domain' ),
        'edit_item'             => __( 'Edit Book', 'text_domain' ),
        'update_item'           => __( 'Update Book', 'text_domain' ),
        'view_item'             => __( 'View Book', 'text_domain' ),
        'view_items'            => __( 'View Books', 'text_domain' ),
        'search_items'          => __( 'Search Book', 'text_domain' ),
        'not_found'             => __( 'Not found', 'text_domain' ),
        'not_found_in_trash'    => __( 'Not found in Trash', 'text_domain' ),
        'featured_image'        => __( 'Featured Image', 'text_domain' ),
        'set_featured_image'    => __( 'Set featured image', 'text_domain' ),
        'remove_featured_image' => __( 'Remove featured image', 'text_domain' ),
        'use_featured_image'    => __( 'Use as featured image', 'text_domain' ),
        'insert_into_item'      => __( 'Insert into book', 'text_domain' ),
        'uploaded_to_this_item' => __( 'Uploaded to this book', 'text_domain' ),
        'items_list'            => __( 'Books list', 'text_domain' ),
        'items_list_navigation' => __( 'Books list navigation', 'text_domain' ),
        'filter_items_list'     => __( 'Filter books list', 'text_domain' ),
    );
    $args = array(
        'label'                 => __( 'Book', 'text_domain' ),
        'description'           => __( 'Post Type Description', 'text_domain' ),
        'labels'                => $labels,
        'supports'              => array( 'title', 'editor', 'thumbnail', 'excerpt', 'comments' ),
        'taxonomies'            => array( 'category', 'post_tag' ),
        'hierarchical'          => false,
        'public'                => true,
        'show_ui'               => true,
        'show_in_menu'          => true,
        'menu_position'         => 5,
        'show_in_admin_bar'     => true,
        'show_in_nav_menus'     => true,
        'can_export'            => true,
        'has_archive'           => true,
        'exclude_from_search'   => false,
        'publicly_queryable'    => true,
        'capability_type'       => 'post',
        'show_in_rest'          => true, // Required for Gutenberg editor
    );
    register_post_type( 'books', $args );

}
add_action( 'init', 'custom_post_type_books', 0 );
This code should be pasted at the bottom of your functions.php file. Once saved, you will see a ‘Books’ menu appear in your WordPress sidebar. This is a comprehensive wordpress custom post type code snippet for beginners that includes labels for every possible interface action.
Important Arguments Explained
When you register custom post types, the $args array is what defines the behavior. Let’s break down some of the most critical parameters:
‘public’ => true
This determines if the post type is intended for use by authors and visitors. If set to false, it won’t appear in the admin UI or the frontend.
‘has_archive’ => true
This allows your CPT to have a dedicated archive page (e.g., yoursite.com/books/). This is vital for SEO as it provides a landing page for all entries of that type.
‘show_in_rest’ => true
This is a newer argument that is absolutely necessary if you want to use the Block Editor (Gutenberg) for your custom post type. If set to false, WordPress will default to the Classic Editor.
‘supports’ => array(…)
This array defines what features the post editor will have. If you forget to include ‘thumbnail’, you won’t be able to set a featured image for your CPT.
How to Add Custom Post Types to WordPress Menu
After creating your CPT, you might wonder how to add custom post types to wordpress menu structures so users can find them. This is quite simple:
- Go to Appearance > Menus.
- On the left-hand side, look for your Custom Post Type name (e.g., Books).
- If you don’t see it, click the ‘Screen Options’ tab at the top right and check the box for your CPT.
- Select the items or the archive you want to add and click ‘Add to Menu’.
Creating Custom Templates for CPTs
Once you’ve mastered the step by step wordpress custom post type guide, you will want to customize how they look. WordPress uses a specific hierarchy to find template files. For a post type called ‘books’, you can create:
archive-books.php: This template will be used for the list of all books.single-books.php: This template will be used for the individual book post.
By creating these files in your theme folder, you can design a layout specifically for your books that differs from your standard blog posts. For instance, you might want to add a ‘Purchase’ button or a ‘Rating’ section that only appears on book pages.
Displaying Custom Post Types on the Homepage
By default, WordPress only displays standard ‘Posts’ on the homepage. If you want to include your wordpress custom content types in the main query, you’ll need to use the pre_get_posts hook. This is a slightly more advanced technique but very useful for creating a unified feed.
function add_custom_post_types_to_query( $query ) {
    if ( is_home() && $query->is_main_query() ) {
        $query->set( 'post_type', array( 'post', 'books' ) );
    }
    return $query;
}
add_action( 'pre_get_posts', 'add_custom_post_types_to_query' );
Troubleshooting: 404 Errors on Custom Post Types
A common issue after you register custom post types is encountering a 404 error when trying to view the single post or archive. This usually happens because the WordPress rewrite rules haven’t been updated. To fix this:
- Navigate to Settings > Permalinks.
- Don’t change anything; just click the ‘Save Changes’ button.
This ‘flushes’ the rewrite rules and tells WordPress to look for the new URL structure of your CPT.
Conclusion
Learning how to create a custom post type manually in wordpress or via a custom post type plugin is a fundamental skill for any WordPress developer. It allows you to transform a simple blog into a complex, organized data machine. By following this wordpress custom post type tutorial for beginners, you now have the tools to create, manage, and display any content type imaginable. For further reading on advanced customization, consider checking out the documentation for Advanced Custom Fields, which pairs perfectly with CPTs to add even more specific data to your content.
Mastering wordpress custom content types opens up endless possibilities. Start by organizing your current content and see how much cleaner your site structure becomes!