In an increasingly hostile digital landscape, the security of your web server infrastructure is paramount. While numerous security plugins and tools promise to protect your websites, relying solely on them can often create a false sense of security or introduce additional vulnerabilities. This comprehensive guide delves into the critical strategies for hardening web server infrastructure without security plugins, focusing on robust, manual configurations that provide foundational and lasting protection. We’ll explore web server security best practices that empower you to take full control of your server’s defenses, ensuring a resilient and secure environment from the ground up.
Many administrators, especially those managing WordPress or other CMS platforms, often turn to plugins for security. While these can offer convenient layers of defense, they also abstract away the underlying mechanisms, making it harder to understand true security posture. Furthermore, plugins themselves can be sources of vulnerabilities if not regularly updated or if poorly coded. Our goal here is to equip you with the knowledge to implement a manual server hardening guide, focusing on core operating system and web server configurations, which are ultimately the most critical layers of defense. This approach emphasizes understanding, control, and a proactive stance against threats, helping you to improve web server defense significantly. For a broader understanding of common web application vulnerabilities, it’s beneficial to consult resources like the OWASP Top 10.
By shunning the plugin-centric approach, we are committing to a more profound and inherently more secure methodology. This isn’t about rejecting all tools, but rather understanding that true security comes from well-configured systems, not just installed software. This guide is tailored for those who wish to secure web server infrastructure without plugins, preferring a hands-on method to build and maintain a fortified web presence. Whether you’re running a small business website or a high-traffic e-commerce platform, these principles apply universally to anyone seeking to solidify their digital foundations.
Understanding Your Web Server Environment for Robust Hardening
Before diving into specific hardening techniques, it’s crucial to have a clear understanding of your web server environment. This knowledge forms the bedrock upon which you’ll build your secure infrastructure. Most web servers today run on a Linux-based operating system, with Apache HTTP Server or Nginx being the dominant choices for serving web content. Understanding the nuances of your chosen OS and web server software is the first step in implementing a truly effective manual server hardening guide.
Operating System Choices and Their Impact on Security
Linux distributions like Ubuntu, CentOS, Debian, and AlmaLinux are popular choices for web servers due to their stability, open-source nature, and robust security features. Each distribution has its own package management system and conventions, but the underlying principles of security hardening remain consistent. A minimalist installation is always recommended – only install packages and services that are absolutely necessary for your web server to function. Unnecessary software broadens the attack surface and introduces potential vulnerabilities. For instance, if you’re aiming to secure web server infrastructure without plugins, a lean OS setup reduces the number of components that could be exploited.
The Role of Web Server Software: Apache vs. Nginx
Apache and Nginx handle requests differently, which impacts how you approach their configuration for security. Apache uses a module-based architecture and often relies on .htaccess files for directory-level configurations. Nginx, known for its performance and efficiency, uses a more centralized configuration file structure. Both are highly configurable and, when properly set up, can offer excellent security. We’ll cover general principles that apply to both, while also touching upon specifics relevant to how to secure Apache web server manually and hardening Nginx web server without security tools.
Phase 1: Operating System Hardening – The Foundation of Security
The operating system is the lowest layer of your server stack that you directly control, making its hardening absolutely critical. A compromised OS means all layers above it are also compromised. Therefore, prioritizing best practices for web server hardening Linux distributions is non-negotiable for anyone looking to secure web server infrastructure without plugins.
Keep the Operating System Updated
The most fundamental security practice is to keep your operating system and all installed software up to date. Security patches frequently address newly discovered vulnerabilities, and failing to apply them promptly leaves your server exposed. Implement a regular schedule for updates. For Debian/Ubuntu, this involves sudo apt update && sudo apt upgrade. For CentOS/AlmaLinux, it’s sudo dnf update or sudo yum update. Consider automatic security updates for critical patches, but always monitor the process to avoid unexpected breakage. This simple step is a powerful component in your strategy to improve web server defense.
Remove Unnecessary Software and Services
Every piece of software running on your server consumes resources and, more importantly, represents a potential entry point for attackers. Conduct a thorough audit of your installed packages and running services. Disable or uninstall anything not directly required for your web server’s operation. This includes development tools, unused databases, mail servers (if not needed), and any other non-essential applications. A minimalist server reduces the attack surface significantly, making it harder for malicious actors to find exploitable weaknesses.
Firewall Configuration (UFW, firewalld, iptables)
A properly configured firewall is your server’s first line of defense against network-based attacks. It controls which traffic is allowed to enter and exit your server. Most Linux distributions come with powerful firewall tools:
- UFW (Uncomplicated Firewall): A user-friendly front-end for
iptables, common on Ubuntu/Debian. - firewalld: A dynamic firewall management tool, prevalent on CentOS/AlmaLinux.
- iptables: The low-level packet filtering system, universally available.
Configure your firewall to allow only essential incoming connections: typically HTTP (port 80), HTTPS (port 443), and SSH (port 22, or a non-standard port if configured). Deny all other incoming traffic by default. For example, using UFW:
sudo ufw default deny incoming
sudo ufw default allow outgoing
sudo ufw allow 80/tcp
sudo ufw allow 443/tcp
sudo ufw allow 22/tcp  # Or your chosen SSH port
sudo ufw enable
This is a critical step in hardening web server configuration, ensuring that only legitimate traffic can reach your server’s services.
Secure SSH Access
SSH (Secure Shell) is the primary method for remote access to your server. Securing it is paramount:
- Disable Root Login: Never allow direct root login via SSH. Instead, log in with a regular user account and use
sudofor administrative tasks. - Use Key-Based Authentication: Implement SSH key pairs instead of passwords. This is significantly more secure as it’s much harder to brute-force a cryptographic key than a password. Disable password authentication entirely once key-based access is confirmed working.
- Change Default SSH Port: While not a security panacea, moving SSH from the default port 22 to a non-standard high port (e.g., 2222, 22222) reduces the noise from automated bots scanning for port 22.
- Limit SSH Access by IP: If possible, restrict SSH access to specific trusted IP addresses using firewall rules or SSH configuration.
These steps to secure web hosting infrastructure through SSH are fundamental and prevent unauthorized access at the deepest level.
User and File Permissions (Least Privilege Principle)
Proper file and directory permissions are crucial for preventing unauthorized access, modification, or execution of sensitive files. The principle of least privilege dictates that users and processes should only have the minimum permissions necessary to perform their functions. Ensure that:
- Web server files (HTML, CSS, JS, images) are owned by the web server user (e.g.,
www-datafor Apache/Nginx on Debian/Ubuntu) and have read-only access for the web server process. - Configuration files (e.g.,
/etc/apache2/,/etc/nginx/) have restrictive permissions, often readable only by root. - Sensitive directories (e.g., upload folders) are carefully managed, ensuring that executable scripts cannot be placed there by unauthorized users.
A common setup for web content might involve:
sudo chown -R www-data:www-data /var/www/html
sudo find /var/www/html -type d -exec chmod 755 {} ;
sudo find /var/www/html -type f -exec chmod 644 {} ;
This ensures directories are executable only by the owner and group, and files are only writable by the owner. Misconfigured permissions are a frequent source of vulnerabilities, making this a vital step in hardening web server configuration. For more detailed information on Linux permissions, consult authoritative resources such as DigitalOcean’s guide on Linux permissions.
Phase 2: Web Server Software Hardening (Apache & Nginx)
With the operating system secured, the next layer of defense focuses on the web server software itself. This section outlines key configurations to secure backend infrastructure without third-party plugins, specifically for Apache and Nginx, the two most popular web servers.
Disable Directory Listings
By default, many web servers will display an index of files in a directory if no index file (like index.html or index.php) is present. This can expose sensitive information about your server’s directory structure and files. Always disable directory listings:
- Apache: In your VirtualHost or
.htaccessfile, addOptions -Indexes. - Nginx: Ensure
autoindex off;is present in your server or location blocks.
This simple configuration prevents casual browsing of your server’s file structure, a crucial step in implementing web server security policies manually.
Limit Access to Sensitive Files and Configuration
Prevent public access to sensitive files such as configuration files, database backups, log files, and version control directories (e.g., .git). These should never be web-accessible.
- Apache: Use
FilesMatchdirectives in your VirtualHost configuration. For example, to deny access to.htaccessand.htpasswdfiles globally:<FilesMatch "^.ht"> Require all denied </FilesMatch>You can also block access to entire directories like
.git. - Nginx: Use
locationblocks to deny access. For example:location ~ /.ht { deny all; } location ~ /.git { deny all; }
These measures are vital for hardening web application server security tips, as they block common vectors for information disclosure.
Implement HTTP Strict Transport Security (HSTS)
HSTS is a security policy mechanism that helps protect websites against man-in-the-middle attacks, cookie hijacking, and protocol downgrade attacks by forcing web browsers to interact with your server only over HTTPS. Once a browser receives an HSTS header, it will automatically connect via HTTPS for a specified duration, even if the user types HTTP.
- Apache: Enable the
mod_headersmodule and add the following to your SSL VirtualHost:<IfModule mod_headers.c> Header always set Strict-Transport-Security "max-age=31536000; includeSubDomains; preload" </IfModule> - Nginx: Add the following to your server block for HTTPS:
add_header Strict-Transport-Security "max-age=31536000; includeSubDomains; preload" always;
Remember to only enable HSTS after you are certain your entire site and all subdomains are accessible exclusively via HTTPS. This is a critical step in improving web server defense against sophisticated network attacks.
Secure SSL/TLS Configuration (Strong Ciphers and Protocols)
SSL/TLS is fundamental for encrypted communication. Improper configuration can weaken this encryption, leaving data vulnerable. Always aim for strong, modern cryptographic protocols and ciphers, and disable deprecated ones (like SSLv2, SSLv3, TLSv1.0, TLSv1.1).
- Apache: In your SSL VirtualHost or global SSL configuration (e.g.,
ssl.conf), configureSSLProtocolandSSLCipherSuite. Example:SSLProtocol All -SSLv2 -SSLv3 -TLSv1 -TLSv1.1 SSLCipherSuite EECDH+AESGCM:EDH+AESGCM:AES256+EECDH:AES256+EDH SSLHonorCipherOrder on - Nginx: In your server block for HTTPS, use
ssl_protocolsandssl_ciphers. Example:ssl_protocols TLSv1.2 TLSv1.3; ssl_ciphers 'TLS_AES_128_GCM_SHA256:TLS_AES_256_GCM_SHA384:TLS_CHACHA20_POLY1305_SHA256:ECDHE-RSA-AES128-GCM-SHA256:ECDHE-RSA-AES256-GCM-SHA384'; ssl_prefer_server_ciphers on;
Tools like the Mozilla SSL Configuration Generator can help you create robust and secure TLS configurations for various web servers. Regularly test your SSL/TLS configuration using services like SSL Labs to ensure it meets current security standards. This is a crucial element when aiming to secure web server infrastructure without plugins, relying on native server capabilities.
Module Management (Disable Unused Modules)
Just like unnecessary OS services, unused web server modules can introduce vulnerabilities and consume resources. Review your Apache or Nginx configuration and disable any modules that are not actively being used by your applications.
- Apache: Use
a2dismodon Debian/Ubuntu (e.g.,sudo a2dismod autoindex) or comment outLoadModuledirectives. - Nginx: Nginx is typically compiled with modules, so this step mostly involves ensuring you’re not loading unnecessary configuration files for modules you don’t use.
A lean, purpose-built web server configuration is always more secure, reinforcing the idea of manual web server security for small businesses and large enterprises alike.
Rate Limiting (Preventing Brute Force & DoS)
While often handled by specialized tools, basic rate limiting can be configured directly in your web server to mitigate brute-force attacks and denial-of-service (DoS) attempts against specific endpoints, like login pages.
- Apache: Modules like
mod_evasiveormod_qoscan provide rate limiting, though installing these might lean into “security tools” territory. Conceptually, you can usemod_rewriteto redirect excessive requests from specific IPs after a certain threshold if you log them. However, for true manual implementation, firewall rules (like usingiptablesto limit connections per IP) are more aligned. - Nginx: Nginx has built-in capabilities for rate limiting using
limit_req_zoneandlimit_reqdirectives. For example:http { limit_req_zone $binary_remote_addr zone=mylimit:10m rate=5r/s; server { location /login/ { limit_req zone=mylimit burst=10 nodelay; # ... other login specific configurations } } }This allows 5 requests per second with a burst of 10 for the
/login/path. This native capability makes hardening Nginx web server without security tools highly effective against certain attack types.
Implementing even basic rate limiting is a proactive measure that enhances your web server security best practices.
Logging and Monitoring
Comprehensive logging is indispensable for detecting and responding to security incidents. Your web server generates access logs and error logs, which provide insights into server activity. Configure these logs to be detailed and ensure they are rotated regularly to prevent disk exhaustion.
- Access Logs: Record every request to your server. Monitor for unusual patterns, repeated failed login attempts (if applicable), or requests for non-existent but sensitive files.
- Error Logs: Critical for identifying issues with your server configuration or application errors that might be exploited.
While external log analysis tools exist, regular manual review of logs (even with simple grep or tail commands) is part of a proactive manual server hardening guide. Consider sending logs to a remote, secure server to prevent attackers from tampering with or deleting logs after a compromise.
Server Signature Removal
By default, Apache and sometimes Nginx might reveal the server version, OS type, and installed modules in error pages or HTTP headers. This information can be valuable to attackers looking for known vulnerabilities. Always disable server signatures:
- Apache: Set
ServerTokens ProdandServerSignature Offin your main Apache configuration file (e.g.,apache2.conforhttpd.conf). - Nginx: Add
server_tokens off;to yourhttp,server, orlocationblocks.
This small step contributes to obscuring details about your server, making it slightly harder for automated scanners to profile potential weaknesses, thereby contributing to your overall strategy to improve web server defense.
Phase 3: Application-Level Considerations (Without Third-Party Tools)
Even with a hardened operating system and web server, the application layer itself can introduce vulnerabilities. While this guide focuses on infrastructure, understanding how to secure underlying application components, particularly PHP and databases, is crucial for a holistic security posture. These tips focus on server-side configurations that impact application security, rather than direct application code changes.
PHP Hardening (if applicable)
If your web server hosts PHP applications, securing PHP is paramount. This involves modifying php.ini directives:
- Disable Dangerous Functions: Restrict functions that can be abused, such as
exec,shell_exec,passthru,system,proc_open,popen,eval,assert,ini_set. Add them todisable_functions.disable_functions = exec,shell_exec,passthru,system,proc_open,popen,eval,assert,ini_set,dl,pcntl_exec,pcntl_signal,pcntl_waitpid,pcntl_wexitstatus,pcntl_wifexited,pcntl_wifsignaled,pcntl_wifstopped,pcntl_getpriority,pcntl_setpriority,posix_kill,posix_mkfifo,posix_setpgid,posix_setsid,posix_setuid,posix_setgid,posix_setegid,posix_seteuid,posix_getpwuid,posix_getgrgid,posix_getpwnam,posix_getgrnam - Restrict File Access: Use
open_basedirto restrict PHP scripts to access files only within specified directories, preventing them from reading arbitrary files on the server.open_basedir = /var/www/html/:/tmp/ - Hide PHP Version: Set
expose_php = Offto prevent attackers from easily identifying the PHP version, similar to removing server signatures. - Increase Resource Limits: Set appropriate
memory_limit,max_execution_time, andmax_input_timeto prevent resource exhaustion attacks. - Error Reporting: In production environments, set
display_errors = Offand log errors to a file (log_errors = On,error_log = /var/log/php_errors.log) instead of displaying them to users.
These adjustments are fundamental for hardening web application server security tips when PHP is involved, greatly reducing the potential for common exploits like arbitrary file inclusion or command injection.
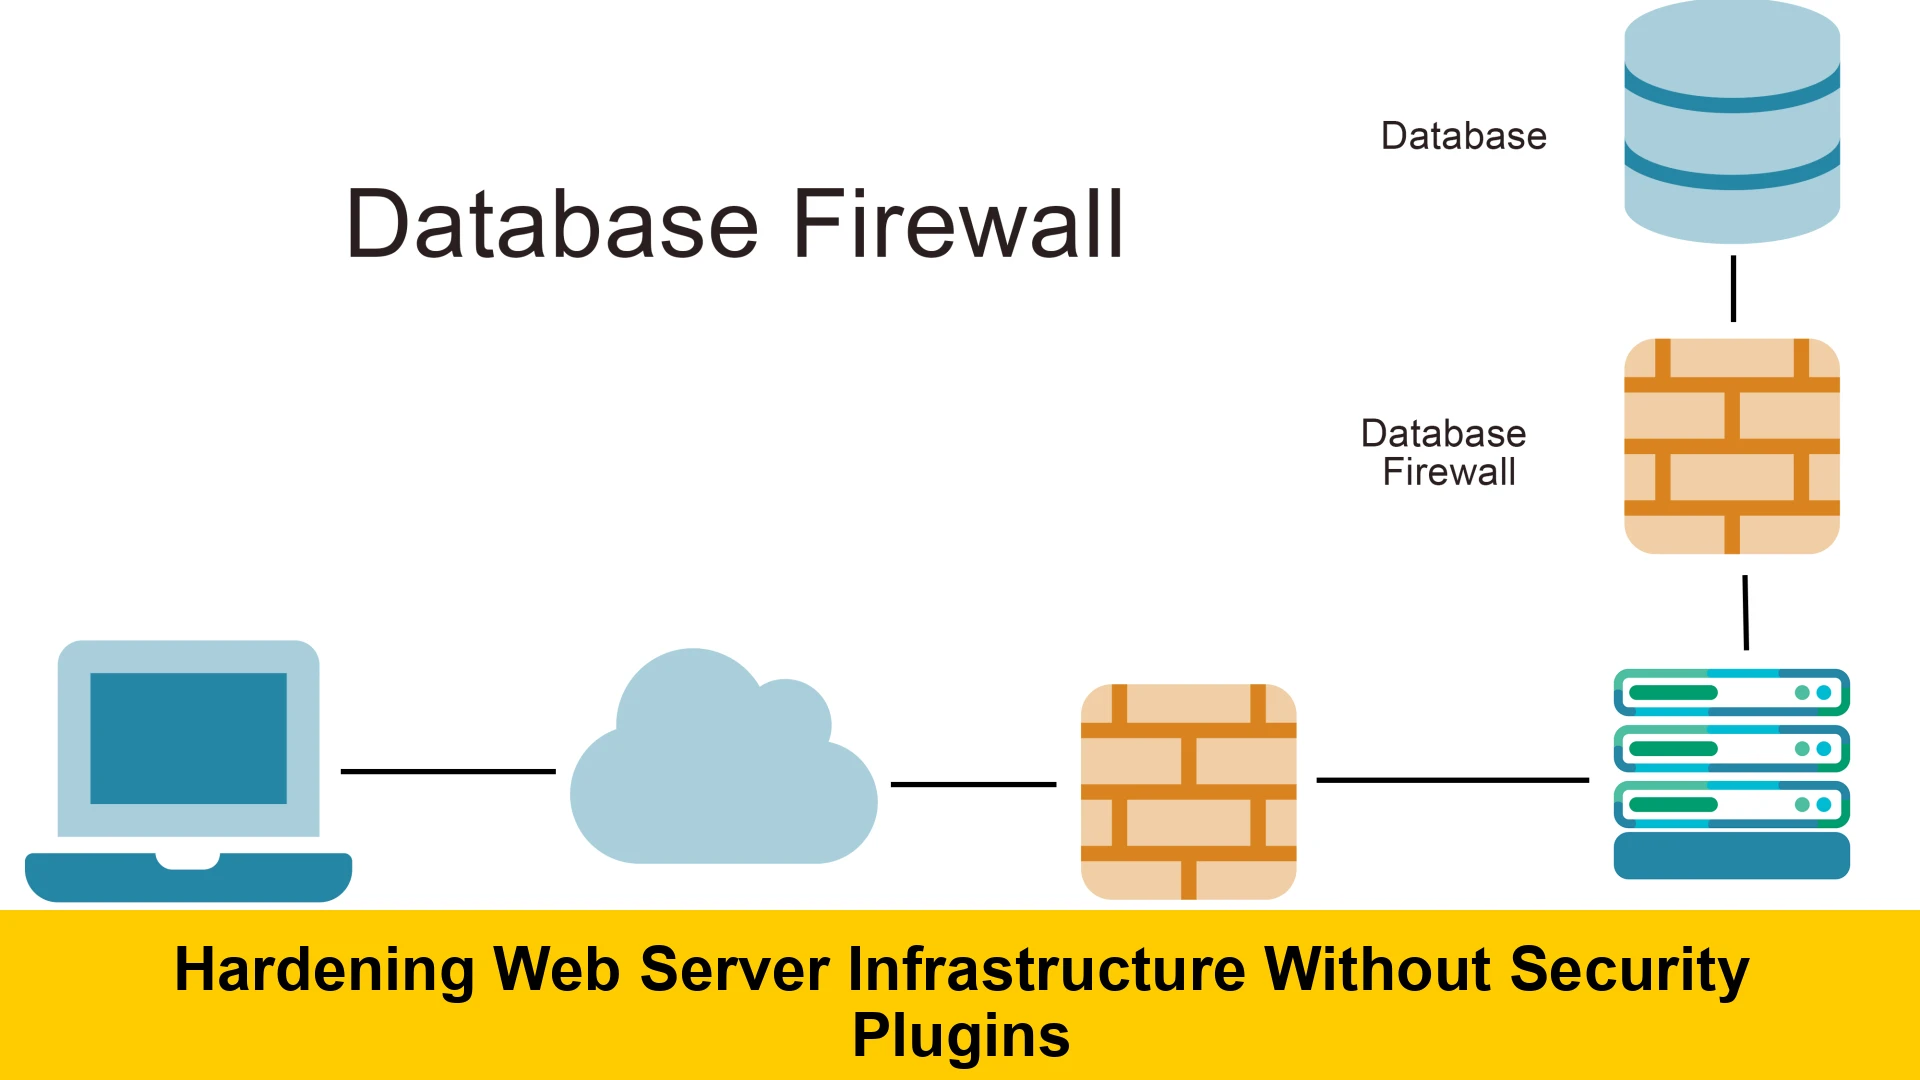
Database Security (if on the same server)
If your database (e.g., MySQL, PostgreSQL) runs on the same server as your web server, its security directly impacts your web infrastructure:
- Strong Passwords: Use complex, unique passwords for database users.
- Restrict Remote Access: Configure your database to listen only on
localhost(127.0.0.1) if the web server and database are on the same machine. This prevents external connections to the database. If remote access is absolutely necessary, restrict it to specific trusted IP addresses using firewall rules or database configuration. - Least Privilege for Database Users: Grant database users only the privileges they absolutely need. For example, a web application user typically only needs
SELECT, INSERT, UPDATE, DELETEpermissions on its specific database, not global administrative rights. - Regular Backups: Implement a robust backup strategy, storing backups securely and off-server.
Securing the database is a key component of a comprehensive manual web server security for small businesses and large operations, ensuring data integrity and confidentiality.
Phase 4: Regular Maintenance and Monitoring – Sustaining Your Hardened Infrastructure
Hardening your web server is not a one-time task; it’s an ongoing process. Continuous maintenance and vigilant monitoring are essential to sustain a strong security posture and effectively improve web server defense against evolving threats.
Scheduled Updates and Patch Management
Reiterate the importance of a consistent update schedule. Beyond the OS, regularly update all server-side software components, including your web server (Apache/Nginx), PHP, database, and any other libraries or dependencies. Automated updates can streamline this, but always review changelogs and test updates in a staging environment if possible to prevent downtime.
Proactive Log Analysis
Don’t just collect logs; analyze them. Regularly review your web server access and error logs, as well as system logs (syslog, auth.log). Look for:
- Repeated failed login attempts (SSH, application logins).
- Unusual traffic patterns or spikes.
- Requests for non-existent sensitive files or administrative interfaces.
- Frequent 4xx or 5xx errors that might indicate an attack or misconfiguration.
While manual log analysis can be tedious, it’s a core aspect of implementing web server security policies manually and understanding the health of your server.
Robust Backup Strategy
Even with the most hardened server, data loss or compromise remains a possibility. A reliable backup strategy is your ultimate safety net. Implement regular, automated backups of your entire server, including:
- Web application files.
- Database dumps.
- Server configuration files (Apache/Nginx configs,
php.ini, firewall rules).
Store backups off-site and test your restoration process periodically to ensure recoverability. This is a foundational practice for steps to secure web hosting infrastructure.
Regular Security Audits and Vulnerability Scans
Periodically conduct manual security audits of your server configuration. Review all hardening steps you’ve implemented to ensure they are still in place and effective. While this guide focuses on manual hardening, occasionally using an open-source vulnerability scanner (e.g., Nikto, Nmap, OpenVAS) in a non-disruptive manner can help identify potential weaknesses from an attacker’s perspective. The key here is not to rely on the tool for “security,” but to use it as an auditing aid to validate your manual configurations. This proactive approach reinforces your commitment to secure web server infrastructure without plugins.
Conclusion: The Power of Manual Hardening
Hardening web server infrastructure without security plugins is not merely a technical exercise; it’s a philosophy that prioritizes understanding, control, and foundational security. By meticulously configuring your operating system, web server software, and application components, you build a resilient defense mechanism that is less prone to the vulnerabilities often associated with third-party tools.
This manual server hardening guide has covered essential web server security best practices, from securing SSH and configuring firewalls to implementing robust SSL/TLS and tightening PHP settings. While this approach demands a deeper technical understanding and more hands-on effort, the benefits are undeniable: a more stable, performant, and significantly more secure web presence. By consistently applying these principles and maintaining vigilance through regular updates and monitoring, you empower yourself to navigate the digital landscape with confidence, knowing you have done your utmost to secure web server infrastructure without plugins and effectively improve web server defense.